Throwback Thursday Tutorial: Temperature Quilt
Hello! Happy Thursday! One of my most popular posts is my temperature quilt finish, but I've never been thrilled about the photos I took of it. I was headed out to photograph another quilt and decided to bring the temperature quilt along and try again.
Much better!
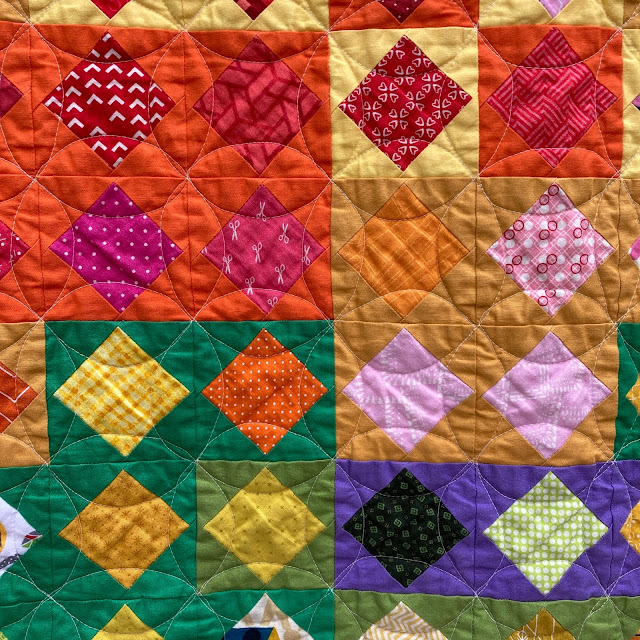
When I decided to make this quilt, I spent a lot of time researching what other people did, then combined all my favorite bits. Each block is a 3" (finished) square in a square block. The inside is a print representing the high temperature and the outside is a solid representing the low temperature. The prints are a combination of blenders and novelty prints to commemorate special days. Both follow the same temperature chart for determining which color to use. If we were traveling, my print represents where we were that day (see the tiny crabs for our trip to Boston?), but the color always refers to the temperature at home. The difference between our highest and lowest temperatures was around 120 degrees, so each color spans seven degrees. If you are in a more temperate climate that could be reduced to five degrees, or a middle color could be dropped.
I can't tell you the exact names of my colors because most of them were unlabeled from my stash. Any rainbow of colors you pick will look great! It's hard to predict yardage, but you can look at the average temperatures in your area for the past few years to estimate how much of each color you will need. My print fabrics weren't exact matches to the solids I used, but close enough that it was obvious what temperature they corresponded to.
One thing that was very important to me in this quilt was that I didn't cut off any corners of my inner squares. I achieved this by using a two-step process. First, I made sure my blocks were slightly oversized so I had wiggle room to cut them down. Second, I used a generous seam allowance to allow for the extra bulk where the points came together. My other goal was to limit fabric waste, which meant that I cut my center squares on-point. As you can see above, all my squares are perfect!
Cutting: You need one 2.5" square for the center and two 3" squares for the outer square. Cut the 3" squares on the diagonal.
Stitching: Sew two of your triangles to opposite sides, then trim the dog ears off and sew the remaining two triangles on.
Trimming: Trim your block down down to a 3.5" square. Leave a 3/8" seam allowance on each side of the center square. There is a lot of bulk where the points come together and this prevents them from getting lost in the seams!
I mostly sewed my blocks in pairs, making two every other day so I could chain piece them, though using them as leaders and enders in other sewing projects works well too! I also sewed my blocks into rows as I went along so there was never any question about where a particular block went. Even rows were pressed to the left and odd rows pressed to the right so all the seams nested when I sewed them together. It was always a happy day when another row could be sewn to the main body of the quilt!
My quilt was laid out in 20 rows of 18 blocks each, with the remaining five blocks incorporated into my quilt label on the back (the quilt label also included a temperature "scale" labeled with what temperature range each color represented). The quilting is an orange peel that I did with my domestic machine; I couldn't resist all those pre-marked squares!
And that's all there is to it! A solid plan and the patience to slowly piece a top together over the course of a year. Let me know if you make a temperature quilt of your own - I'd love to see it!


Comments